Title: Exploring Environmental Sensing: Integrating the BME280 Sensor with STM32 Nucleo
Introduction:
In the realm of embedded systems and IoT applications, environmental sensing plays a crucial role. Monitoring temperature, humidity, and pressure levels is essential in various domains, from weather forecasting to indoor climate control and industrial automation. In this blog post, we delve into the integration of the BME280 temperature sensor with the STM32 Nucleo development board, offering insights into the setup, programming, and potential applications of this powerful combination.
1. Understanding the BME280 Sensor:
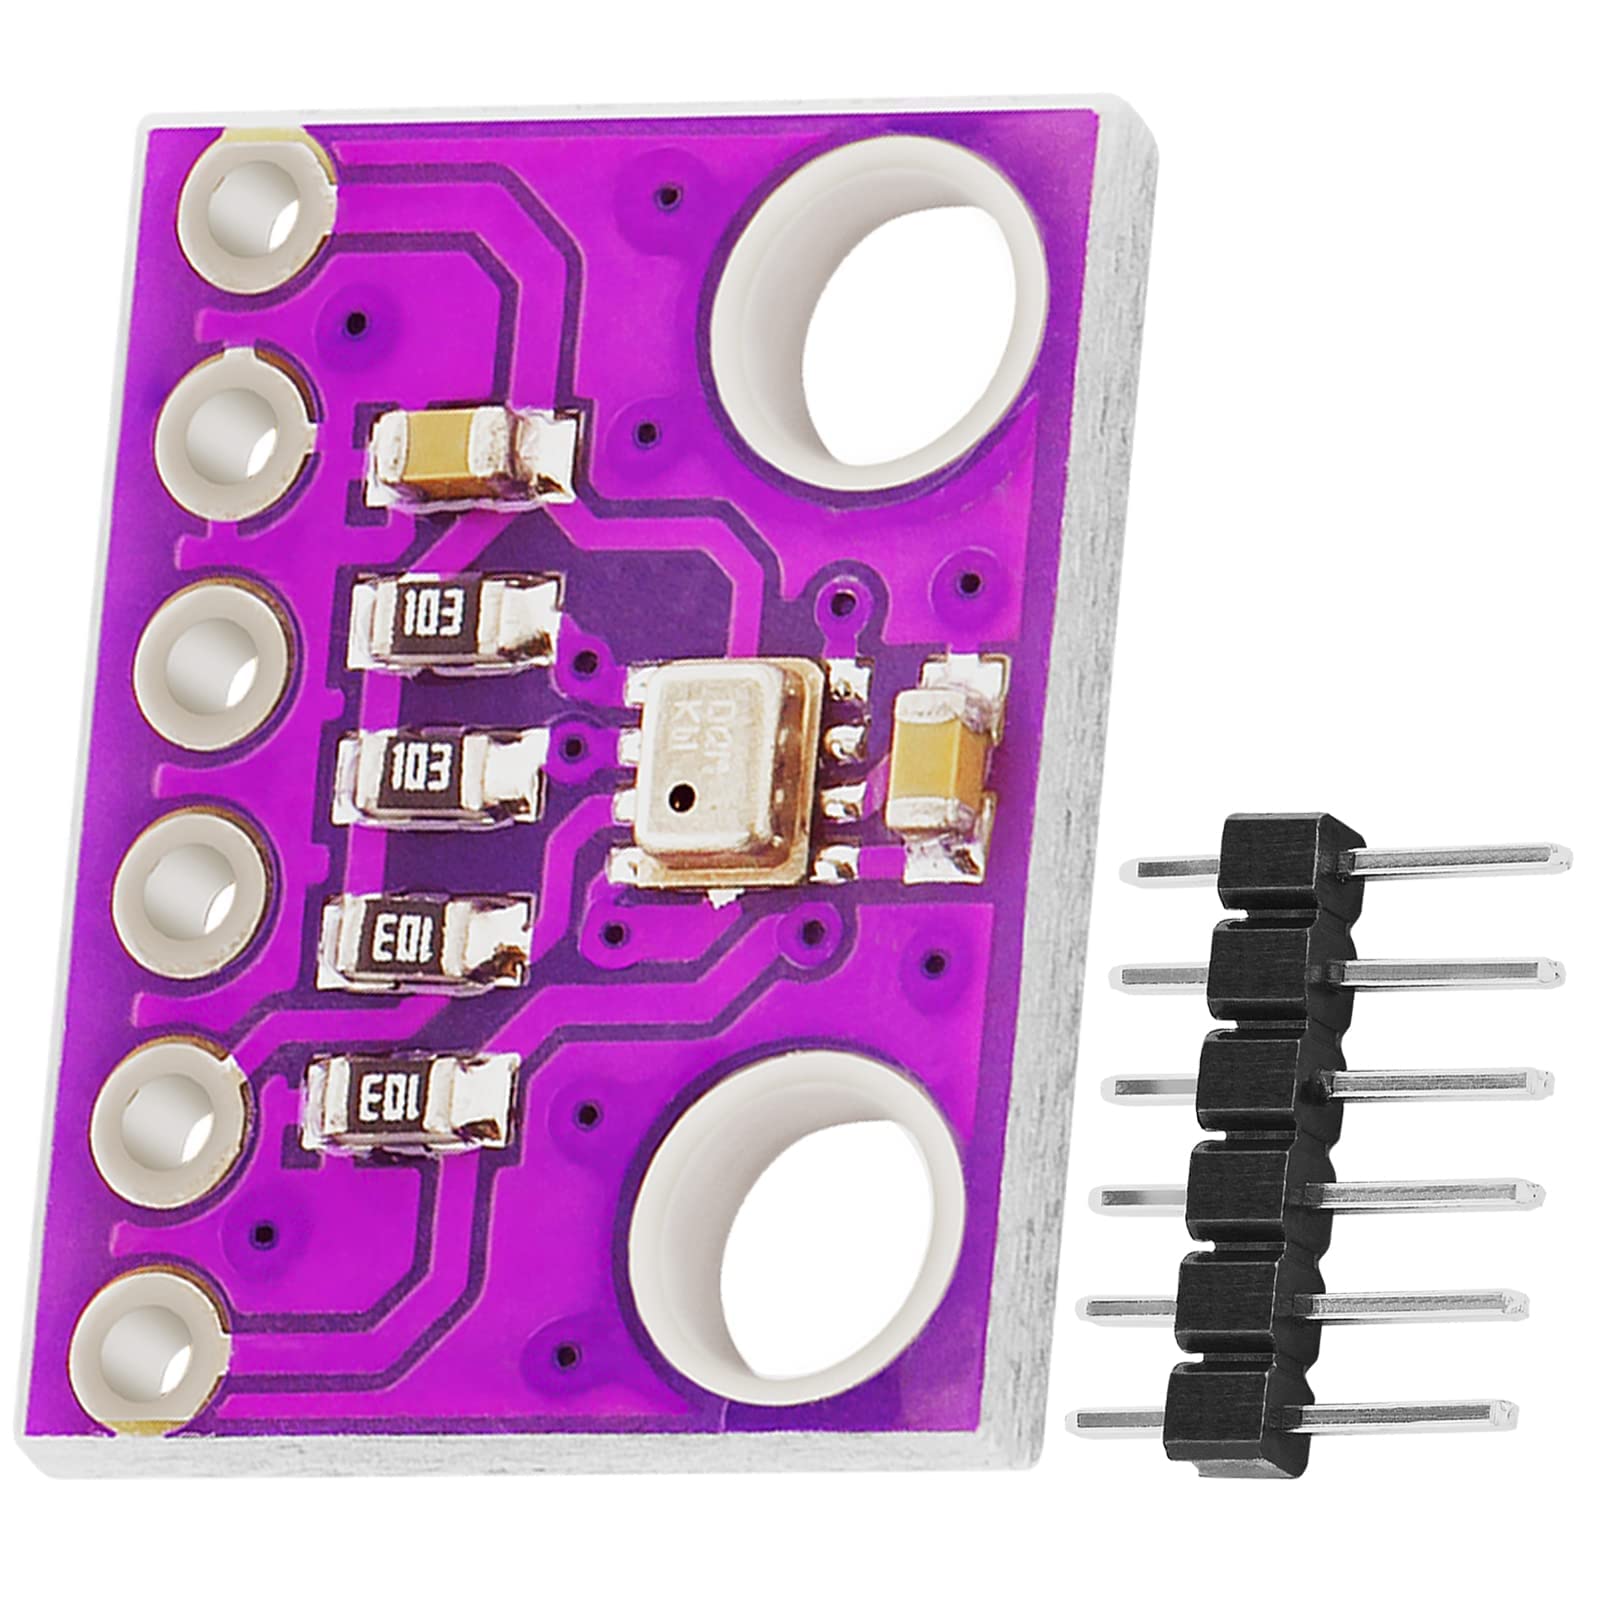
BMP280 is an absolute barometric pressure sensor designed by Bosch in an extremely compact package targetting mobile applications. Since this it has a low power consumption and a small package, this product is ideal for implementation in battery driven devices such as mobile phones, GPS modules or watches

- It measures;
- Barrometric air pressure
- Temperature
2. Introduction to STM32 Nucleo:
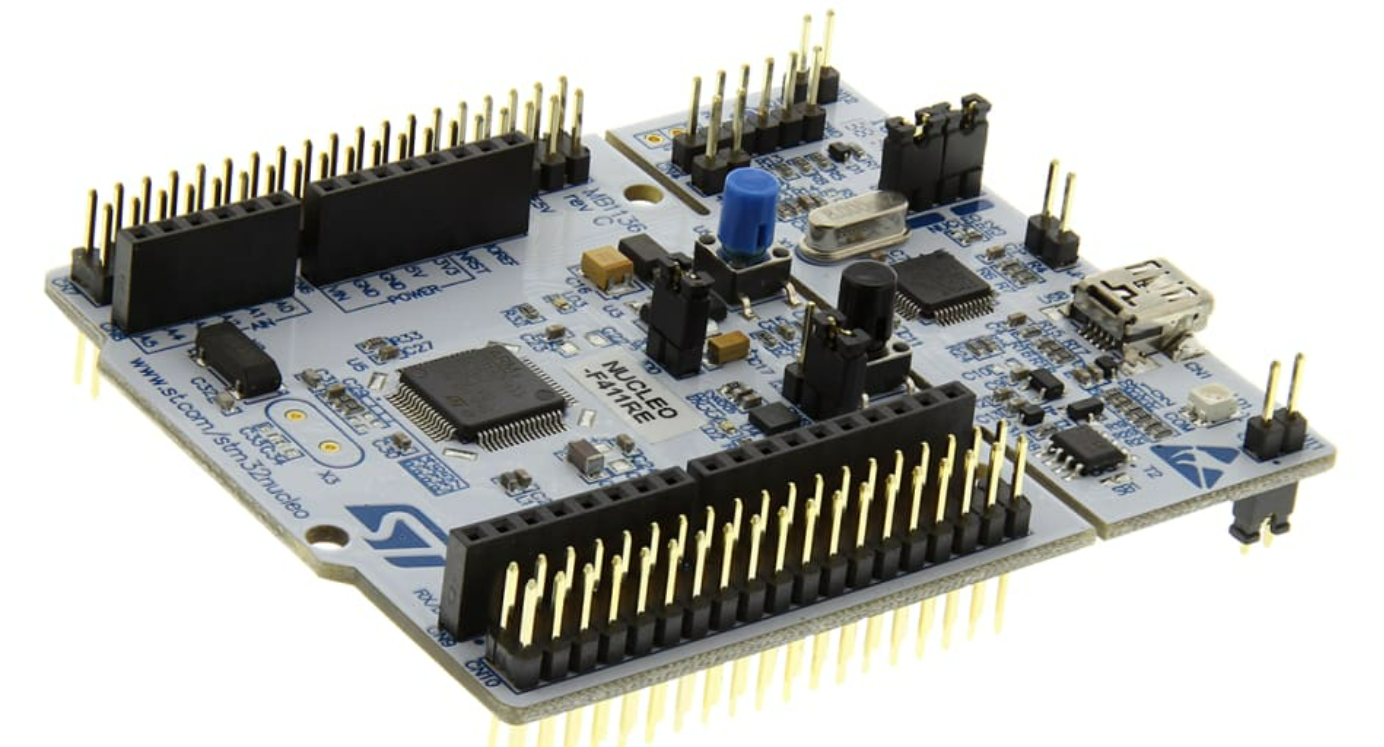
The STM32 Nucleo development board is a powerful and resource rich platform for prototyping and developing embedded applications. This development platform doesn’t need any external programmer as it integrates the ST-LINK/V2-1 debugger/programmer. This Nucleo board series are based on ARM Cortex-M 32-bit RISC processor based microcontrollers with energy efficiency.
For this excercise I have used a Nucleo board with STM32F411RE ARM Cortex-M4 chip.

3. Hardware Setup:
BMP280 has two commucnication interfaces which are SPI and I2C for interfacing with microcontrollers or processors. Here we are using I2C interface to read the data from our STM32 development board. STM32 chips usually contains single or multiple I2C interfaces. Our STM32F411RE have three I2C interfaces and I am using “i2c2” interface from them. I have connect Vcc and Gnd pins of the BMP280 to the 3.3V and Gnd power connections of the Nucleo board. Next, SCL and SDA for serial wire communication are connected to D15 and D14 pins of Nucleo board respectively as follows.


4. Software Implementation:
Here we are programming the STM32 Nucleo using an STM32CubeIDE. Before jump in to the code, let’s see the steps in reading pressure ans tesmparture readings.
- Initialize BMP280
Here we are doing the BMP280 sensor initialization in two steps according to the following fucntions. First we configure sensor registers by writing following values. You can refer BMP280 datasheet to have a better understanding on the registers and configuration steps.
register 0xF5 : The standby time as 500ms (bits:100), filter value as 16(bits:101) and then the SPI functionality is set as disabled(bits:00).
register 0xF4 : osrs_t x2 (bits:010), osrs_p 101 (bits:101) and then the Operatinhg mode to normal(bits:11).
void BMP280_init(void)
{
	I2C_Write_Register(BMP280_dev_address, 0xF5, 0b10010000);// standby time 500ms 100, filter 16 100, SPI DIS 00
	I2C_Write_Register(BMP280_dev_address, 0xF4, 0b01010111);// osrs_t 010 x2, osrs_p 16 101, mode normal 11

	BMP280_get_calib_values();
}
Then we need to calibrate the BMP280 using the pre-stored values in the built-in calibration registers as follows. read all the uint16_t vlues and assign them into the varibles which we declared. 3 of them are for temperature sensor calibration and 6 of them are for pressure sensor calibration.
  void BMP280_get_calib_values(void)
{
	uint8_t rx_buff[24], starting_address=0x88;

	HAL_I2C_Master_Transmit(&hi2c1, BMP280_dev_address, &starting_address, 1, 10000);
	HAL_I2C_Master_Receive(&hi2c1, BMP280_dev_address + 1, &rx_buff[0], 24, 10000);

	Dig_T1=(rx_buff[0])+(rx_buff[1]<<8);
	Dig_T2=(rx_buff[2])+(rx_buff[3]<<8);
	Dig_T3=(rx_buff[4])+(rx_buff[5]<<8);
	Dig_P1=(rx_buff[6])+(rx_buff[7]<<8);
	Dig_P2=(rx_buff[8])+(rx_buff[9]<<8);
	Dig_P3=(rx_buff[10])+(rx_buff[11]<<8);
	Dig_P4=(rx_buff[12])+(rx_buff[13]<<8);
	Dig_P5=(rx_buff[14])+(rx_buff[15]<<8);
	Dig_P6=(rx_buff[16])+(rx_buff[17]<<8);
	Dig_P7=(rx_buff[18])+(rx_buff[19]<<8);
	Dig_P8=(rx_buff[20])+(rx_buff[21]<<8);
	Dig_P9=(rx_buff[22])+(rx_buff[23]<<8);
}
- Data Reading
void BMP280_calc_values(void)
{
	uint8_t status, rx_buff[6], starting_address=0xF7;

	do
	{
		status=I2C_Read_Register(BMP280_dev_address, 0xF3);
	} while(((status&0b00001000)==8)||((status&0b00000001)==1));

	HAL_I2C_Master_Transmit(&hi2c1, BMP280_dev_address, &starting_address, 1, 10000);
	HAL_I2C_Master_Receive(&hi2c1, BMP280_dev_address + 1, &rx_buff[0], 6, 10000);

	volatile uint32_t temp[3];
	temp[2]=rx_buff[3];
	temp[1]=rx_buff[4];
	temp[0]=rx_buff[5];
	temperature_raw=(temp[2]<<12)+(temp[1]<<4)+(temp[0]>>4);

	temp[2]=rx_buff[0];
	temp[1]=rx_buff[1];
	temp[0]=rx_buff[2];
	pressure_raw=(temp[2]<<12)+(temp[1]<<4)+(temp[0]>>4);

		altitude=44330.0f*(1-powf(pressure/101325.0f,1.0f/5.255f));//altitude=((powf(101325.0/pressure, 1/5.257f)-1)*(temperature+273.15f))/0.0065f;
}
-
Temparature Reading
-
Data compensation
  double var1, var2;
	var1=(((double)temperature_raw)/16384.0-((double)Dig_T1)/1024.0)*((double)Dig_T2);
	var2=((((double)temperature_raw)/131072.0-((double)Dig_T1)/8192.0)*(((double)temperature_raw)/131072.0-((double)Dig_T1)/8192.0))*((double)Dig_T3);
- Temparature calculation
	double t_fine = (int32_t)(var1+var2);
  volatile	float T = (var1+var2)/5120.0;
	temperature=T;
-
Pressure Reaading
-
Data Compensation
var1=((double)t_fine/2.0)-64000.0; var2=var1*var1*((double)Dig_P6)/32768.0; var2=var2+var1*((double)Dig_P5)*2.0; var2=(var2/4.0)+(((double)Dig_P4)*65536.0); var1=(((double)Dig_P3)*var1*var1/524288.0+((double)Dig_P2)*var1)/524288.0; var1=(1.0+var1/32768.0)*((double)Dig_P1);- Pressure calculation
volatile	double p=1048576.0-(double)pressure_raw;
  p=(p-(var2/4096.0))*6250.0/var1;
  var1=((double)Dig_P9)*p*p/2147483648.0;
  var2=p*((double)Dig_P8)/32768.0;
  p=p+(var1+var2+((double)Dig_P7))/16.0;
  pressure=p;
5. Testing:

After successfully building the project without errors, we can move to the testing with our hardware setup. Once the wiring is okay we can debug the software by uploading to the STM32Nucleo board. Since we are using Nucleo’s UART interface, we can open a serial monitor. Here I am using Arduino Serial monitor for this project.
Once you hit the run button of STM32 cube IDE or press the reset button of the Nucleo board, it will start the program and send data via serial interface to the serial monitor as the following image.

7. Conclusion:
- Recap the key points covered in the blog post, including the setup process, programming, testing, and applications.
- Emphasize the importance of environmental sensing in modern IoT and embedded systems.
- Encourage readers to explore further and experiment with integrating sensors into their own projects using STM32 Nucleo and other development platforms. .
By the end of this blog post, readers should have a comprehensive understanding of how to integrate the BME280 temperature sensor with the STM32 Nucleo development board, along with insights into its potential applications in environmental sensing projects.


Leave a comment