This blog post aims to give an introduction to Node-red tool and how to create a simple project with Node-red on RaspberryPi.
Beginner’s Guide for IoT with Node-RED on Raspberry Pi
Introduction
The Internet of Things (IoT) has revolutionized the way we interact with devices and the world around us. With IoT, everyday objects are connected to the internet, enabling them to send and receive data. Node-RED, a flow-based development tool, makes it easy to create IoT applications by wiring together devices, APIs, and online services.
Node-Red
Node-RED is an open-source visual programming tool designed for flow-based development of IoT applications. It provides a browser-based flow editor that allows users to wire together devices, APIs, and online services in a visual manner. Node-RED is built on top of Node.js, which allows it to run on various platforms, including Raspberry Pi, cloud environments, and edge devices
Node-Red on Raspberry Pi
Why Node-Red on an RPi?
-
Visual Programming: Node-RED provides a visual programming environment that allows users to create IoT applications by simply dragging and dropping nodes, making it easy for beginners to get started with IoT development.
-
Raspberry Pi GPIO Support: Node-RED has built-in support for interacting with the Raspberry Pi’s GPIO pins, allowing users to easily interface with sensors, actuators, and other hardware components.
-
Dashboarding: Node-RED includes a dashboard feature that allows users to create web-based dashboards for visualizing data from IoT devices, making it easy to monitor and control IoT applications from anywhere.
-
Prototyping and Rapid Development: The combination of Raspberry Pi and Node-RED enables rapid prototyping and development of IoT applications, allowing developers to quickly iterate on ideas and concepts.
-
Open-Source and Customizable: Node-RED is open-source and highly customizable, allowing users to extend its functionality by creating custom nodes and modules to suit their specific IoT project requirements.
Setting Up Raspberry Pi
- Get a Raspberry Pi: Purchase a Raspberry Pi board(Here I’ve used a RPi 3B+ for this preoject) along with essential accessories like a microSD card and a power supply.
- Install Raspberry Pi OS: Download and install Raspberry Pi OS on the microSD card using the Raspberry Pi Imager tool. Boot Raspberry Pi: Insert the microSD card into the Raspberry Pi, connect it to a monitor, keyboard, and mouse, and power it up.
- Installing Node-RED Open Terminal: Launch the terminal on Raspberry Pi.
Update Raspberry Pi:
sudo apt-get update
sudo apt-get upgrade
Install Node-RED: Use the following command to install Node-RED:
bash <(curl -sL https://raw.githubusercontent.com/node-red/linux-installers/master/deb/update-nodejs-and-nodered)
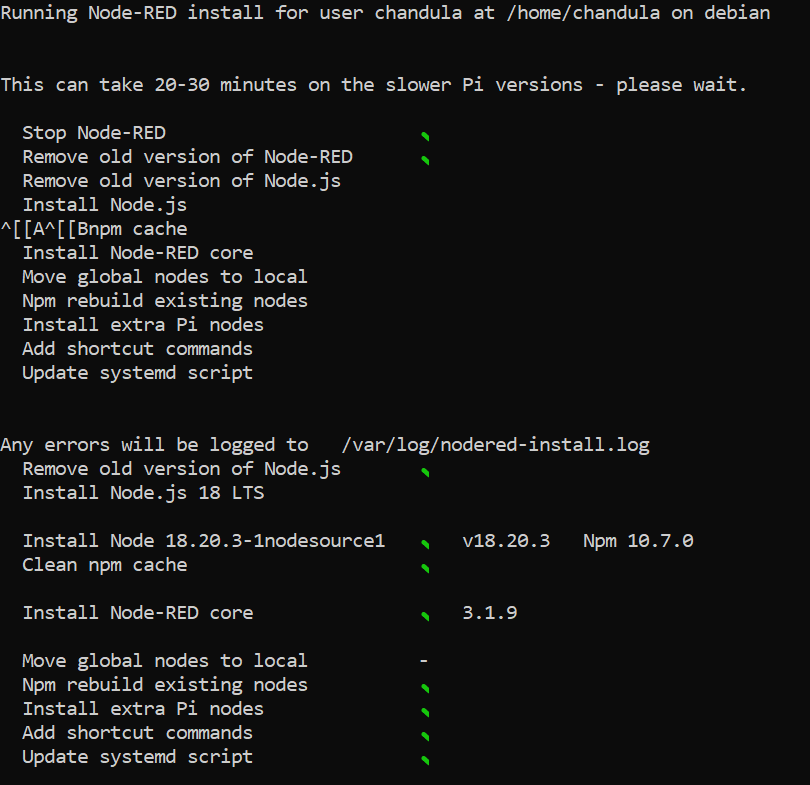
Configure Node-Red Settings: After installing, it is recommended to configure initial options and settings. Once the intallation process is copmleted, it will automatically take you to the configuration stage and ask to set the parameters one-by-one. In a case the installation process do not take you to the configuration stage, please run the following command to initiate the configuration:
node-red admin init
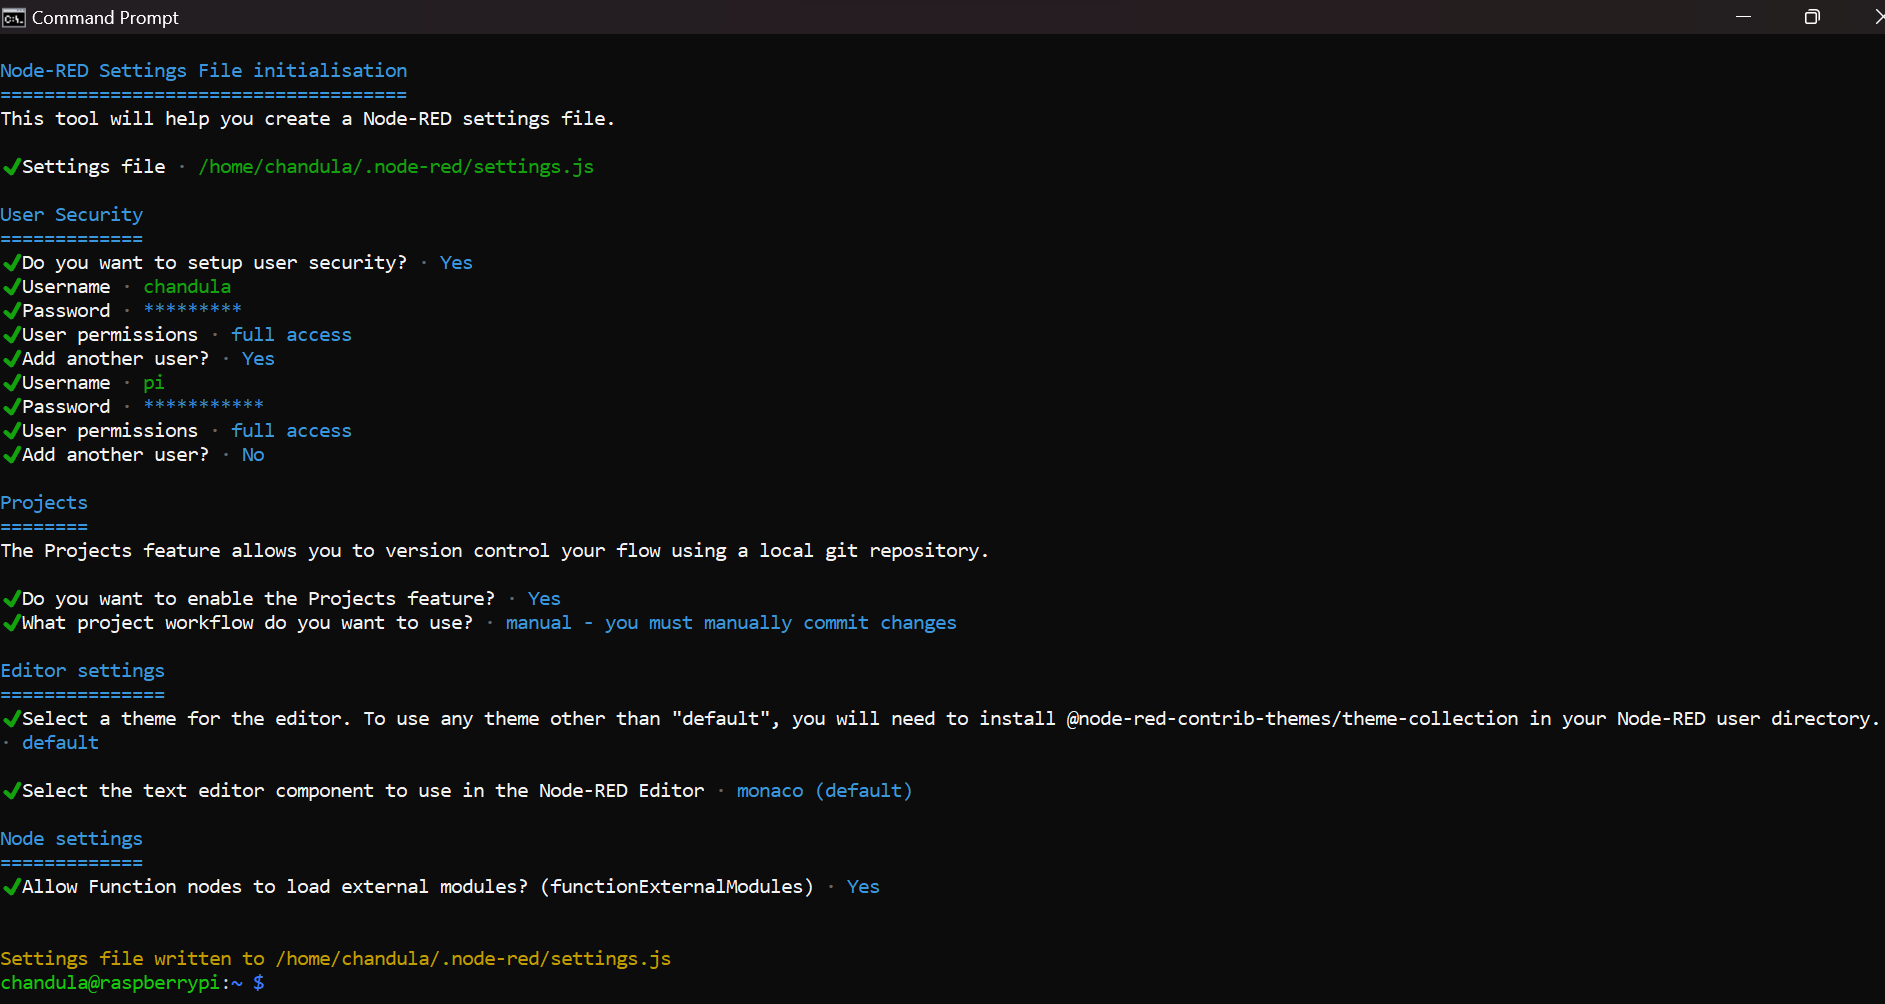
Once the Node-RED configuration was successful as the above sceenshot. All settings will be saved on settings.js file.
After successfully completed the configuration stage, start node-red on your RPi with the following command;
node-red-start
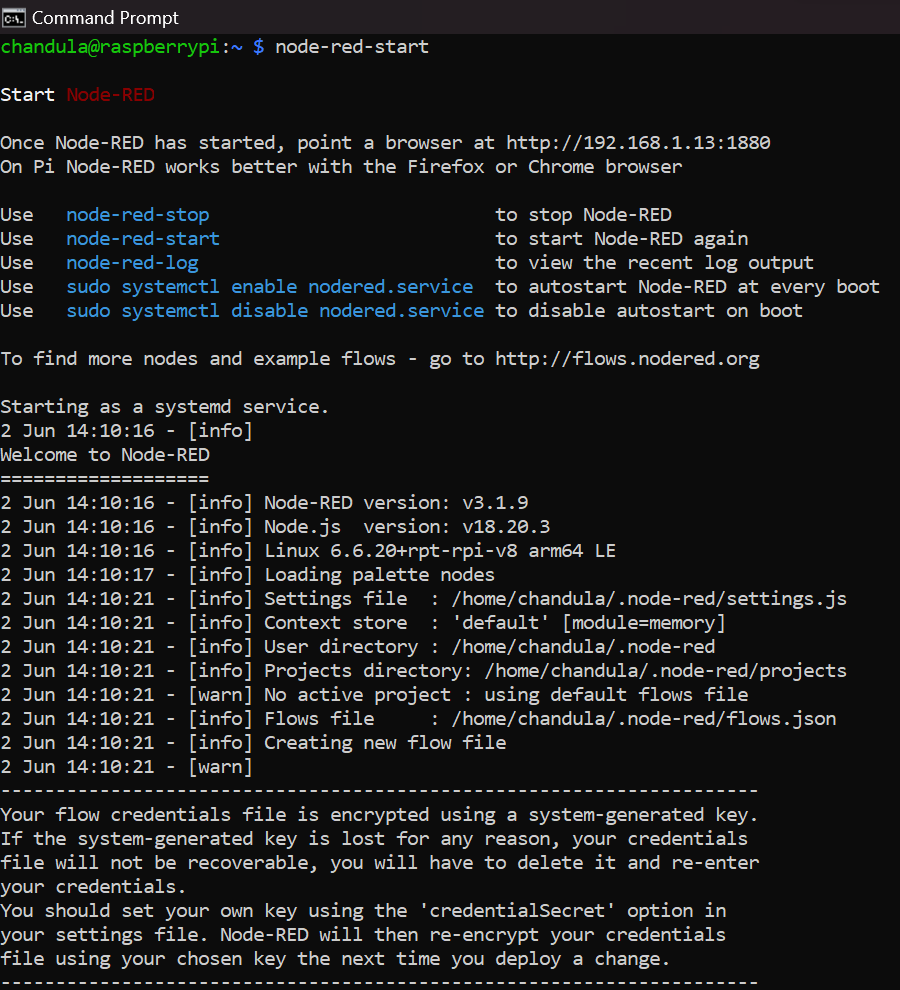 You will see a set of status messages on the terminal as the above screenshot while the node-red is running.
Node-red User Interface
Access Node-RED: Open a web browser and navigate to http://localhost:1880 to access the Node-RED editor.
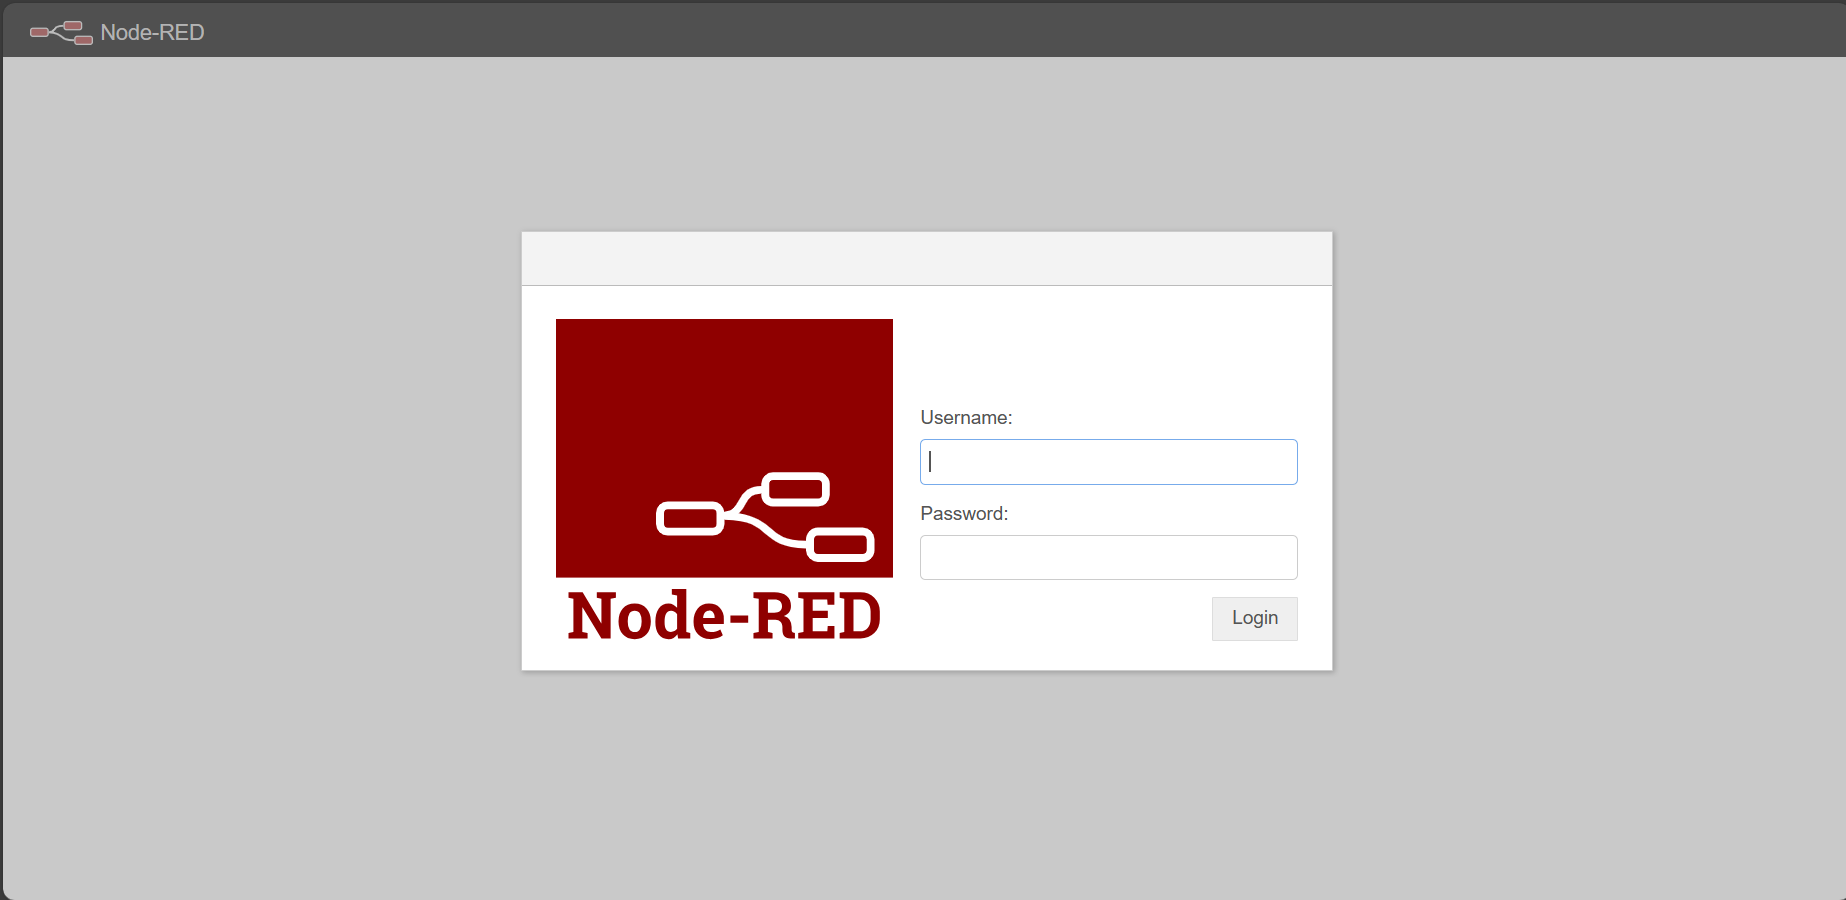
You will be directed to a login prompt where you can enter the pre-assigned username and password there. After a successful login you will see the Node-red user interface where there are several palettes for different purposes as the below image.
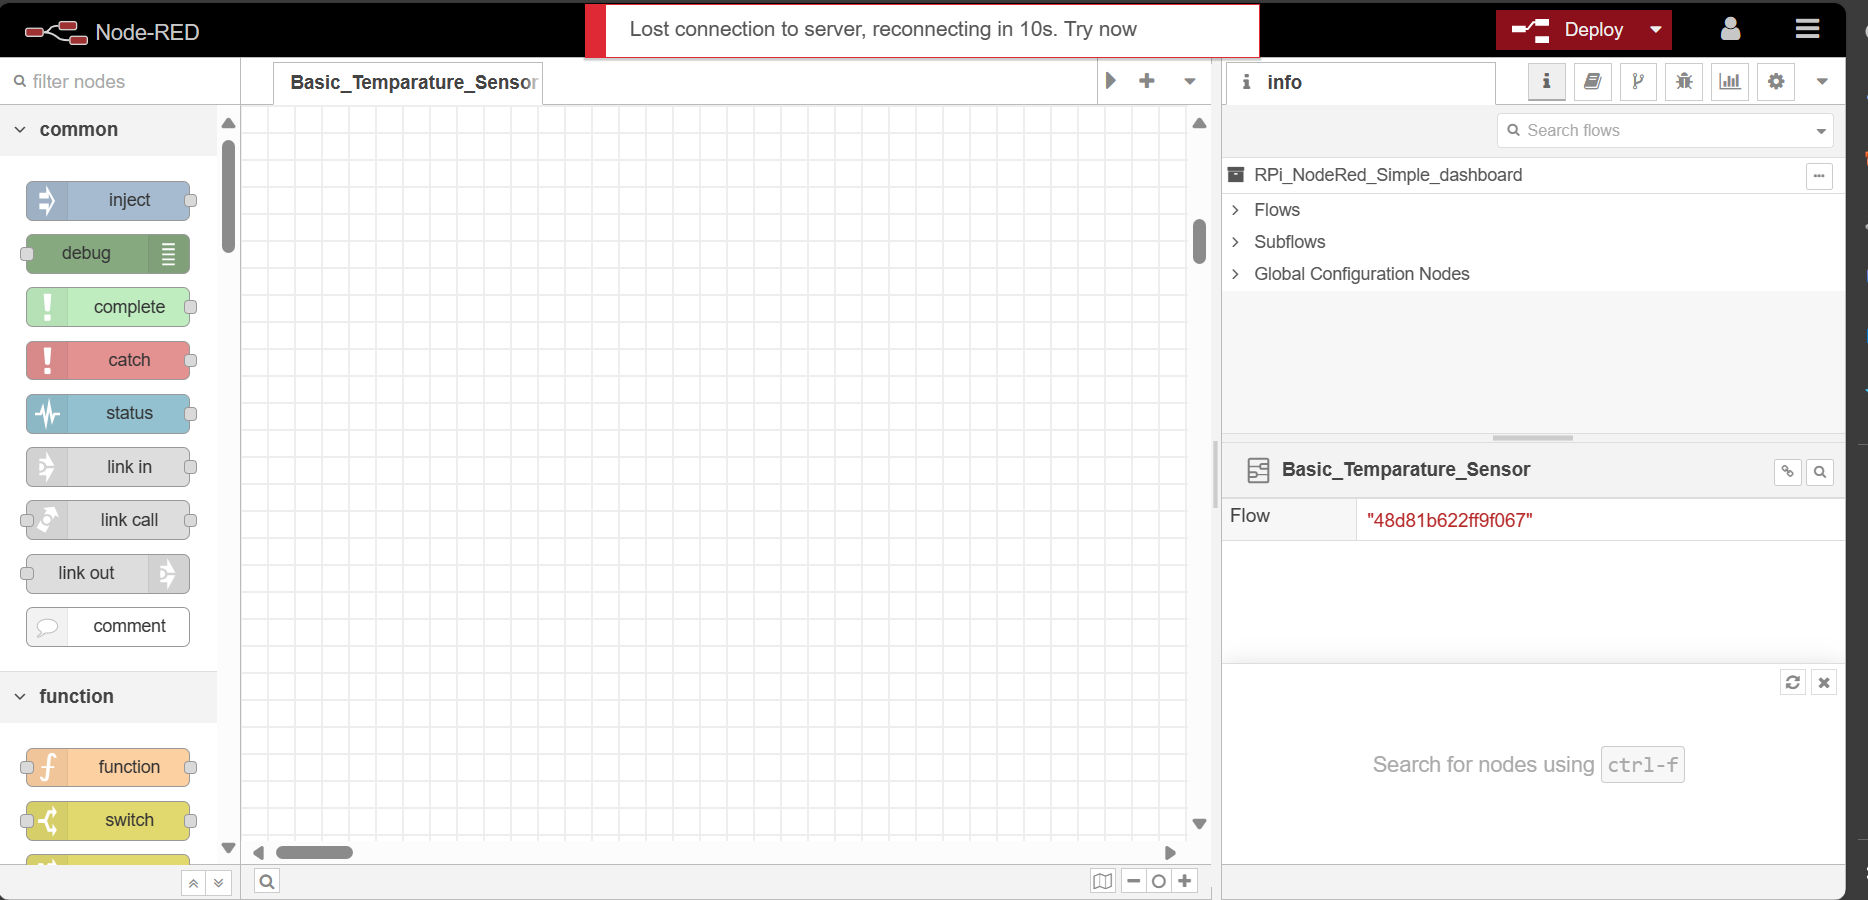
In the left corner, we have the list of nodes and in the right-corner section we have Project navigaor, debug and dashboard panels.
Drag and Drop Nodes: In the Node-RED editor, drag nodes from the palette onto the workspace. Nodes represent devices, APIs, and functions. Connect Nodes: Click and drag from the output of one node to the input of another to create connections
Creating Your First Flow
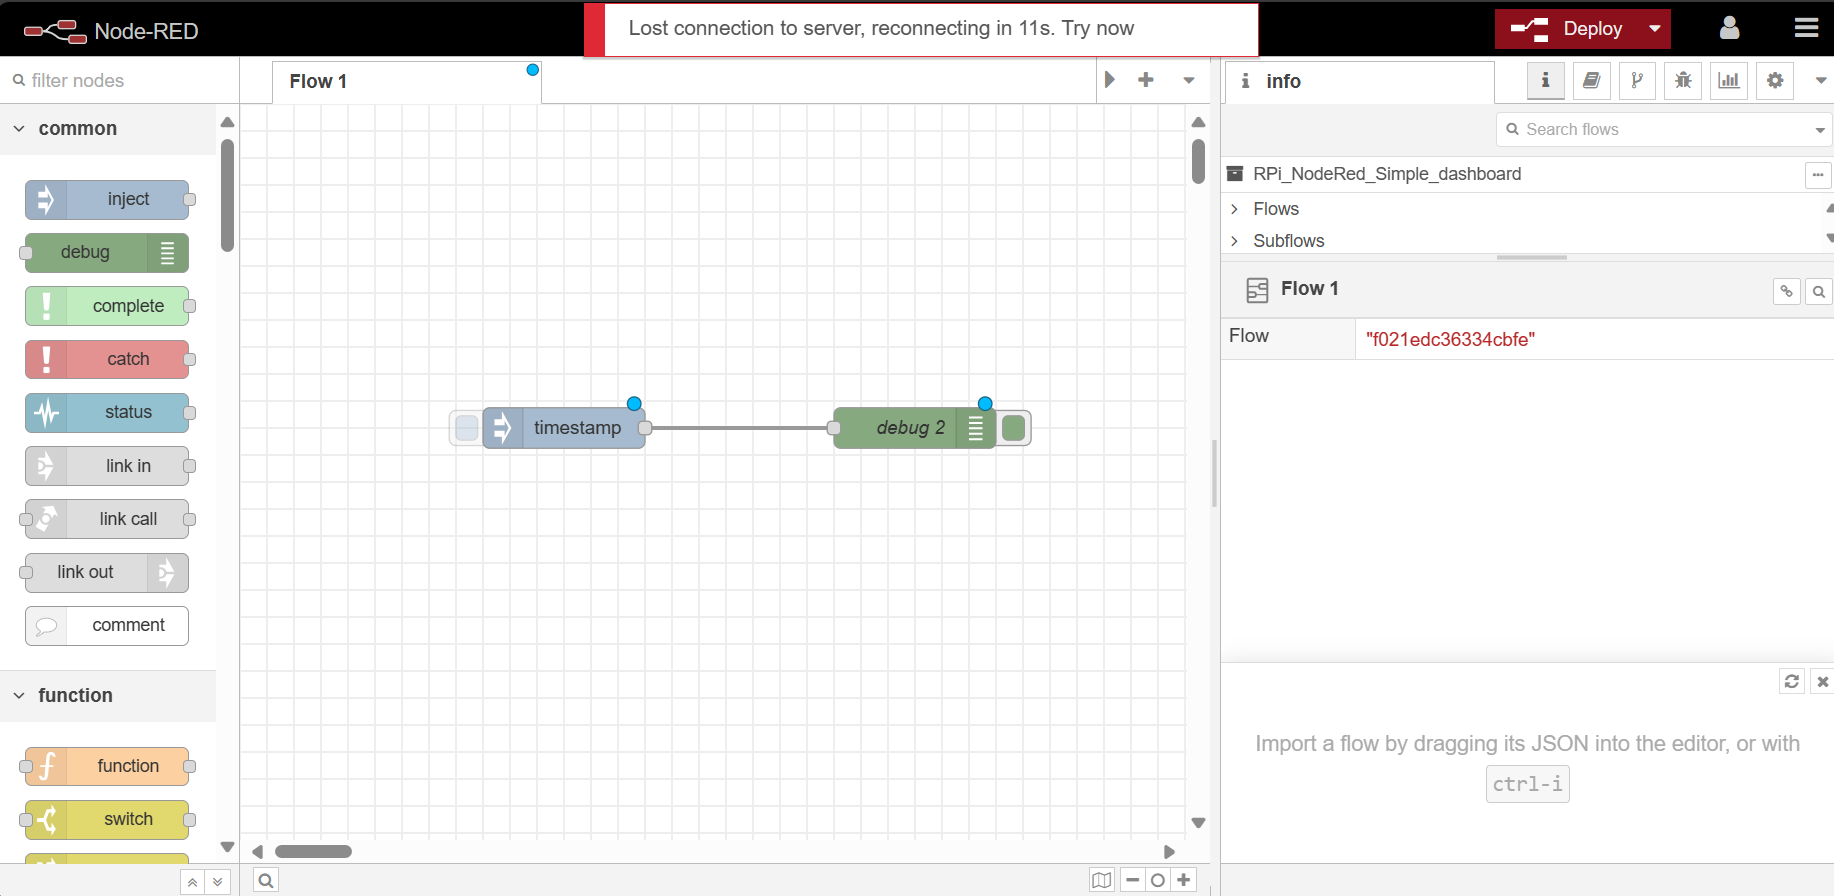
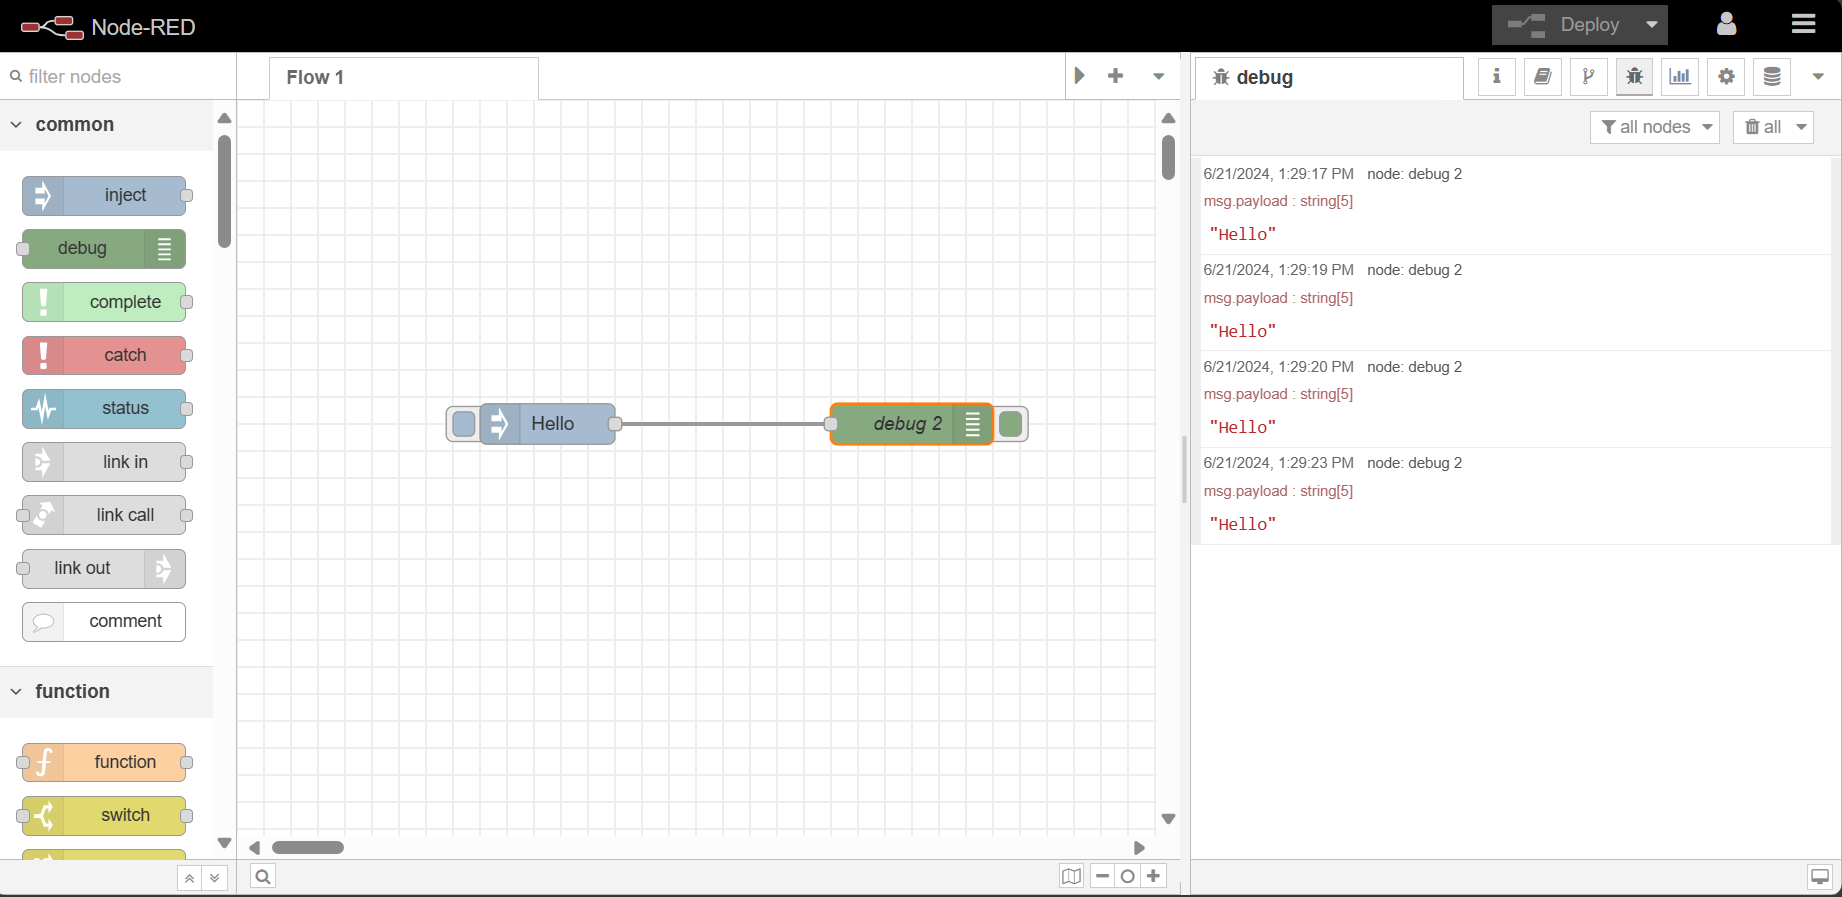
Drag and Drop Nodes: In the Node-RED editor, drag ‘Inject’ and ‘debug’ nodes from the palette onto the workspace.
Connect Nodes: Click and drag from the output of the inject node to the input of the debug node to create the connection (flow).
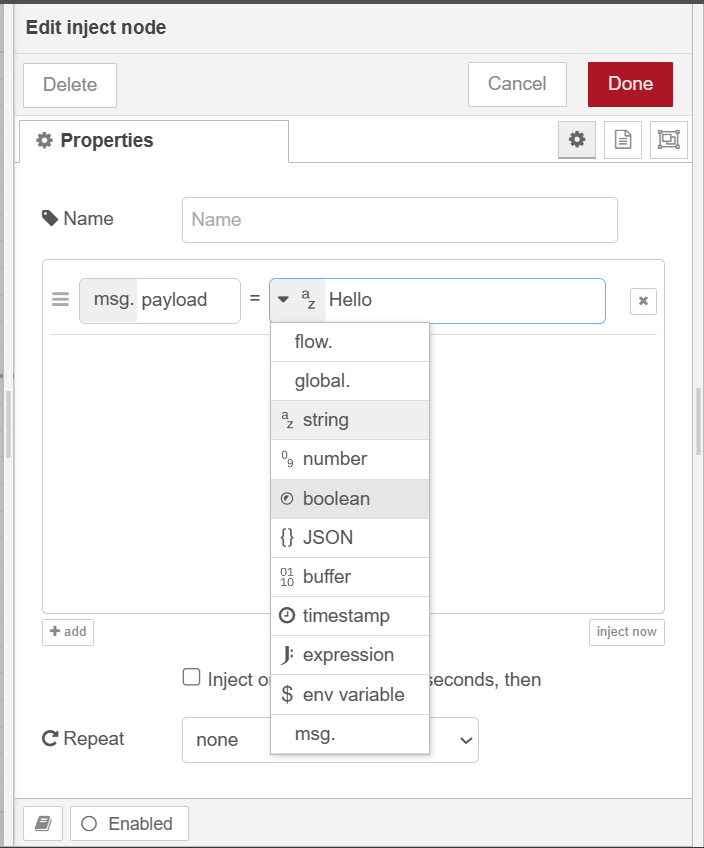
Edit Inject node: Double click on the inject node and get the properties window. There select the ‘string’ as the payload type and enter “Hello” on the payload field.
Check the Debug node: Click on the debug node and go to the properties tab.There we do ont need to edit eny properties for this test. just close the window.
Deploy Flow: Click the “Deploy” button to deploy your flow. Your first test application is now running!
Now you can go to the ‘debug’ palette from the right-corner tabs which shows the output from te debug nodes. Once you click the button beside the ‘inject’ node, it will trigger the flow to send the message to the debug node. You will see the message in the debug section as well just like the bellow screeshot.
Congratulations!! you have successfully learned the basics of node-red interface.
Node-RED simplifies IoT development on Raspberry Pi, allowing beginners to create powerful IoT applications with ease. By following this guide, you can start building your IoT projects and explore the endless possibilities of IoT with Node-RED.
There are many more wonderful features in this tool. We’ll bring some of the projects with node-red in the future blog posts.
Please feel free to ask any questions or clarifictaions regarding the post content in the comment section bellow. Thanks!!


Leave a comment